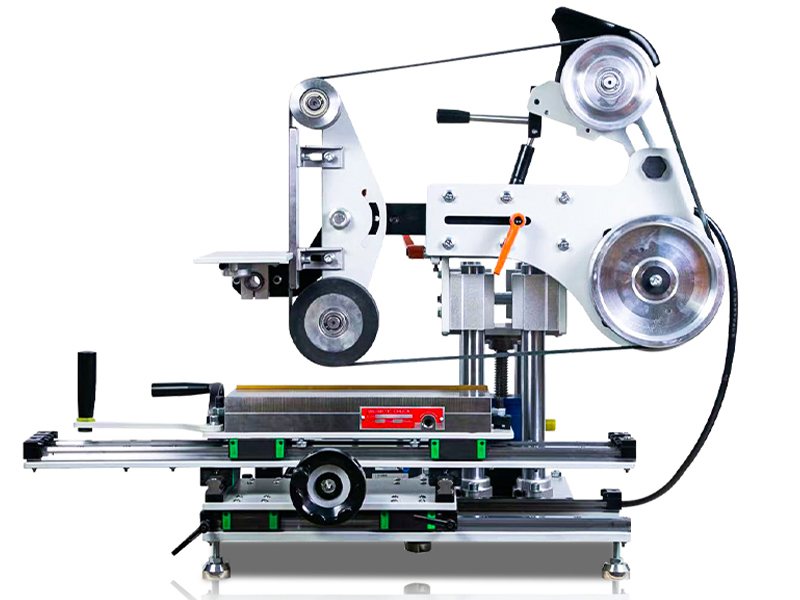
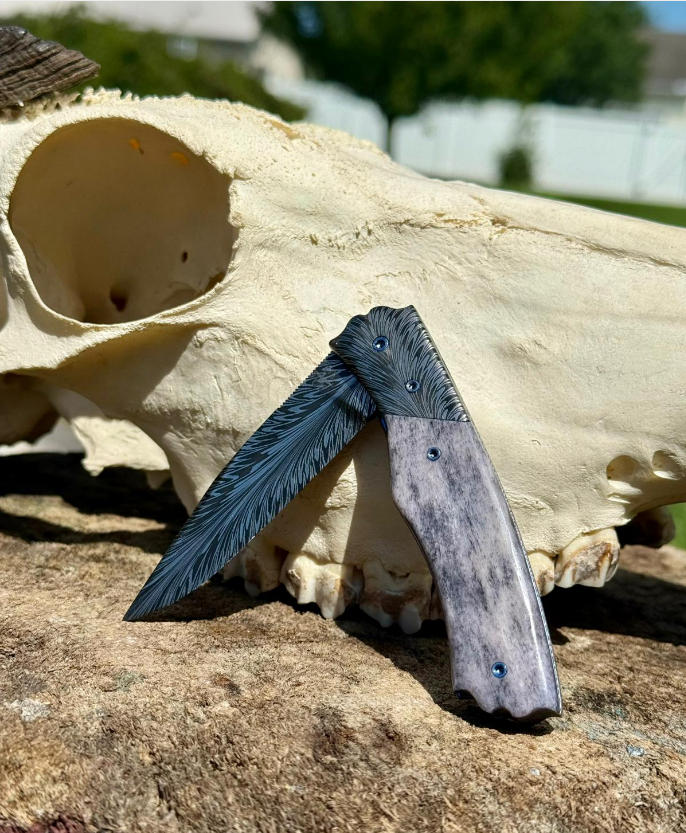
Metal Deburring - Making a knife via the stock removal method involves starting with a flat piece of steel and grinding away excess material to form the blade, rather than forging it from scratch. The ADV 116-9 belt grinder is an excellent tool for this, as it's a versatile 2x72" belt sander designed for precision metalwork like knife shaping and beveling. Its adjustable speed (500–3000 SFPM), quick-change belts, and sturdy frame make it ideal for both beginners and pros, handling tough steels like O1 or Damascus without stalling. This guide assumes basic DIY skills and focuses on safety—always wear eye protection, gloves, a respirator, and ear protection when grinding.
Materials
Item | Description/Purpose | Quantity |
|---|
Steel blank | 1/8" thick O1 tool steel (or similar high-carbon steel; ~6-8" long rectangle) for the blade | 1 |
Handle scales | Walnut wood slabs (or micarta/G10; 1/8" thick, matching tang size) | 2 |
Brass pins | 1/8" diameter, 360 brass for handle attachment | 2-3 |
Epoxy | T-88 structural epoxy for gluing scales | Small tube |
Abrasive belts | Assorted grits for ADV 116-9 (40-120 coarse, 180-400 medium, 600-1000+ fine; ceramic/zirconia for steel) | Several |
Ferric chloride | Diluted (1:2 with water) for optional blade etching | 1 bottle |
Nail polish/acetone | For masking during etching | As needed |
0000 steel wool | For cleaning etch residue | Small amount |
Canola oil | Heated to ~125°F for quenching during heat treat | 1 quart |
Food-safe oil/wax | E.g., Burt's Bees lip balm for blade protection | Small jar |
Optional: Leather | 4-5 oz for handle wrap; 5-6 oz for sheath | Pieces as needed |
Tools
ADV 116-9 Belt Grinder: Core tool for profiling, beveling, and finishing the blade.
Hacksaw or bandsaw: For rough-cutting the blank.
Drill and bits: For pin holes and alignment (1/8" bit matches pins).
Dremel with sanding drums: For fine details and epoxy scoring.
Small forge/oven: For heat treating and tempering.
Files or Lansky sharpening system: For hardness testing and final edge.
Clamps, sharpie, magnet: For marking, alignment, and heat treat checks.
Optional: Ball peen hammer for hammered finish; leather tools for wrap/sheath.
 Step-by-Step Guide
Design and Cut the Blank Sketch your knife on paper (e.g., drop-point or chef style) and transfer to cardboard for a template. Trace onto the steel blank with a sharpie, leaving room for the tang (handle area). Secure the blank in a vise and rough-cut the outline with a hacksaw. Clean up edges on the ADV 116-9 using a coarse 40-80 grit belt at medium speed (~1500 SFPM) to avoid burning the steel. Keep the platen flat for straight lines.
Optional Hammered Finish For a textured look, clamp a steel block as an anvil and lightly hammer the blade sides with a ball peen hammer. Alternate sides to keep it flat—this adds character before grinding.
Mark and Grind Initial Profile Draw a center line down the blade spine with a sharpie (use a straight edge or drill bit to scratch it). On the ADV 116-9, set to high speed (~2000-2500 SFPM) with a 50-80 grit belt. Grind the sides and spine freehand, maintaining even pressure to shape the full profile. Leave ~1/16" extra material on the bevels to prevent warping later.
Prepare Handle Scales Cut wood slabs to match the tang. Drill pin holes in the tang first, then use them as guides for the scales (insert temporary drill bits for alignment). Rough-profile the scales on the ADV 116-9 with a 120 grit belt, leaving a slight gap from the metal—sand to 300 grit by hand for smoothness.
Heat Treat the Blade Heat the blade in a forge to non-magnetic (~1450-1500°F; use a magnet to check). Soak 10-15 minutes, then quench in warm canola oil. Temper in an oven at 400°F for 2 hours (twice, cooling between). Test: A file should skate off the edge without biting. This hardens the steel for durability.
Grind the Bevels (Core Grinding Step) This is where the ADV 116-9 shines for precision bevels (typically 15-25° angle).
Coarse Grind (40-120 grit): Tilt the worktable or blade to your angle. Grind from the center line outward, removing bulk to establish the bevel. Dip in water frequently to cool—overheating warps steel. Use the flat platen for straight edges; freehand curves gently.
Medium Grind (180-400 grit): Switch belts and refine scratches. Use a bevel jig if available for consistency.
Fine Grind (600+ grit): Polish to a satin or mirror finish. For razor edges, add a leather stropping belt. Grind until the bevel meets the edge cleanly—this reduces later sharpening time. Pro Tip: The ADV's belt tracking ensures even wear for symmetrical bevels—check alignment after each belt change.
Optional Etching Mask the edge with nail polish, clean with acetone, and etch in diluted ferric chloride (5-10 min intervals). Scrub residue, then re-grind bevels on a fine belt to reveal shiny contrasts.
Assemble the Handle Score the tang for epoxy grip. Apply T-88 epoxy, insert brass pins, and clamp scales overnight. Cut pins flush, then grind smooth on the ADV 116-9 (use 220 grit to avoid scratching wood). Hand-sand to 400+ grit and apply oil finish.
Sharpen and Finish Use a guided system like Lansky on a honing stone or the ADV with a fine belt for the initial edge. Test for shaving sharpness. Protect the blade with food-safe oil. Optional: Add a leather wrap or sheath for ergonomics.
 Safety Precautions and Tips
Safety First: The ADV 116-9 has an emergency stop and dust ports—use them! Connect to a shop vac for metal dust. Never grind without PPE; secure loose clothing/hair .
Machine Maintenance: Clean the platen after each session; tension belts properly to prevent slippage. Start slow for control on intricate work.
Common Pitfalls: Overheating (cool often); uneven bevels (use consistent pressure/angle); dull belts (swap frequently).
Time Estimate: 10-20 hours total for a beginner, with grinding taking 4-6 hours.


